No-Knead Crusty Artisan Bread

One of my most reader-tested and approved recipes! This crusty, fluffy artisan bread needs only 4 ingredients and 5 minutes to come together… you won’t believe how easy and delicious it is!

No-Knead Crusty Artisan Bread – My most reader-loved recipe! This crusty, fluffy artisan bread needs only 4 ingredients and 5 minutes. | thecomfortofcooking.com

I have something amazing to share with you today! I mean, you’ve seen artisan bread before but you’ve probably never seen it as easily made as this! I’d say this is one part recipe, one part magic trick… it’s just incredible. You’ve gotta trust me.

No-Knead Crusty Artisan Bread – My most reader-loved recipe! This crusty, fluffy artisan bread needs only 4 ingredients and 5 minutes. | thecomfortofcooking.com

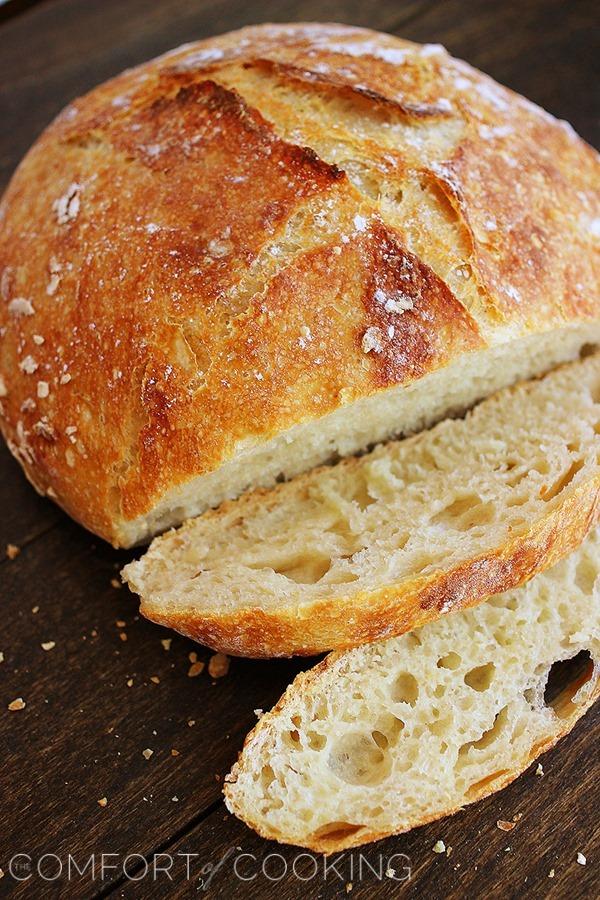
The beautiful, crusty and fluffy bread that results from just four ingredients will knock your socks off! All it takes is flour, salt, yeast and water, all mixed up in a bowl and set to rest for 8-24 hours. Sounds like a lifetime, I know, but waiting is the only difficult part of this recipe.

Just make sure your flour is fresh and yeast isn’t expired. I’ve used both active dry yeast and highly active dry yeast with great results!

No-Knead Crusty Artisan Bread – My most reader-loved recipe! This crusty, fluffy artisan bread needs only 4 ingredients and 5 minutes. | thecomfortofcooking.com

Look at those scrumptious slices! They’re just begging to be slathered with goat cheese and honey, or topped with tomatoes, basil and a drizzle of good olive oil.

Oh, the possibilities…

No-Knead Crusty Artisan Bread – My most reader-loved recipe! This crusty, fluffy artisan bread needs only 4 ingredients and 5 minutes. | thecomfortofcooking.com

I get it, though. You probably already have lots of questions about how it’s baked, what kind of cookware you can use besides a Dutch oven, and how long you should let yours rise. You can click “Read More” to scroll through the picture tutorial, full recipe, and my notes. These are just all the answers I found when I had some of the same questions!

No-Knead Crusty Artisan Bread – My most reader-loved recipe! This crusty, fluffy artisan bread needs only 4 ingredients and 5 minutes. | thecomfortofcooking.com

The dough only takes 5 minutes to come together, but it does take some time to rise. All of your patience totally pays off when this lovely loaf comes out of your oven, though.

If, like me, you’re standing there slack jawed when it’s done, you know you got it right!

I’ve already made a few of these fabulous loaves and will make many more around the holidays, too. I can envision mixing in lots of fun flavorings… rosemary, lemon zest, Parmesan, garlic and cranberries just to name a few ideas!

[Scroll down to see the full written recipe with no pictures. This is just a tutorial to give you an idea of what each step should look like. Hope it’s helpful!]

No-Knead Crusty Artisan Bread – My most reader-loved recipe! This crusty, fluffy artisan bread needs only 4 ingredients and 5 minutes. | thecomfortofcooking.com

In a large bowl, stir together your flour, salt and yeast. Make sure to use fresh, non-expired ingredients. Pour in warm water and gently stir until you’ve created a messy, shaggy dough that looks something like this (above). Do not over-work the dough. That’s it!

No-Knead Crusty Artisan Bread – My most reader-loved recipe! This crusty, fluffy artisan bread needs only 4 ingredients and 5 minutes. | thecomfortofcooking.com

Just cover the bowl tightly with plastic wrap and let it sit anywhere between 8-24 hours at room temperature. You want it to rise and “bubble” to the surface. I let this dough rise about 9 hours.

No-Knead Crusty Artisan Bread – My most reader-loved recipe! This crusty, fluffy artisan bread needs only 4 ingredients and 5 minutes. | thecomfortofcooking.com

Once it’s risen, place your Dutch oven into a 450 degree F oven to preheat. See notes below about other cookware you can use.

Meanwhile, pop your dough out onto a well floured surface. It will be sticky, but with floured hands you can easily form it into a round dough ball.

No-Knead Crusty Artisan Bread – My most reader-loved recipe! This crusty, fluffy artisan bread needs only 4 ingredients and 5 minutes. | thecomfortofcooking.com

Cover it loosely with plastic wrap while your Dutch oven preheats. If the cookware you’re using isn’t enameled or nonstick, slip a piece of parchment paper underneath the dough at this point.

No-Knead Crusty Artisan Bread – My most reader-loved recipe! This crusty, fluffy artisan bread needs only 4 ingredients and 5 minutes. | thecomfortofcooking.com

Carefully remove your Dutch oven from the oven, pop in your dough, and cover it with the lid. Back into the oven it goes, so set that timer for 30 minutes and wait for the magic to happen!

No-Knead Crusty Artisan Bread – My most reader-loved recipe! This crusty, fluffy artisan bread needs only 4 ingredients and 5 minutes. | thecomfortofcooking.com

Isn’t this amazing?! Here’s what it will resemble after baking for 30 minutes. Now remove the lid, put it back in the oven, and bake an additional 7-15 minutes uncovered.

The uncovered baking time just depends on your oven. Mine only needed 7 more minutes to get gorgeous golden brown, but it can vary. Just keep an eye on it.

No-Knead Crusty Artisan Bread – My most reader-loved recipe! This crusty, fluffy artisan bread needs only 4 ingredients and 5 minutes. | thecomfortofcooking.com

Voila! Pop it out, slice it up, and slather one (or twelve) with butter, STAT.

No-Knead Crusty Artisan Bread

No-Knead Crusty Artisan Bread

Yield: 1 loaf

Ingredients

  • 3 cups all-purpose flour
  • 2 teaspoons kosher salt, not table salt
  • 1/2 teaspoon dry yeast, active dry or highly active dry work best
  • 1 1/2 cups lukewarm water

Special cookware needed:

  • Dutch oven or any large oven-safe dish/bowl and lid*

Instructions

  1. In a large bowl, stir together the flour, salt and yeast. Stir in water using a wooden spoon until the mixture forms a shaggy but cohesive dough. Do not over-work the dough. The less you "work" it, the more soft, fluffy air pockets will form.
  2. Cover bowl tightly with plastic wrap. Let dough sit at room temperature for 8-24 hours*. Dough will bubble up and rise.
  3. After dough is ready, preheat oven to 450 degrees F. Place your Dutch oven, uncovered, into the preheated oven for 30 minutes.
  4. While your Dutch oven preheats, turn dough onto a well-floured surface. With floured hands, form the dough into a ball. Cover dough loosely with plastic wrap and let rest.
  5. After the 30 minutes are up, carefully remove Dutch oven. With floured hands, place the bread dough into it. (You can put a piece of parchment under the dough if your Dutch oven isn’t enamel coated.)
  6. Replace cover and bake for 30 minutes covered. Carefully remove cover and bake for 7-15 minutes* more, uncovered.
  7. Carefully remove bread to a cutting board and slice with a bread knife.
  8. Enjoy!

NOTES

  1. Uncovered baking time depends on your oven. In my oven, the bread only needs 7 minutes uncovered until crusty and golden brown, but this can vary. Just keep an eye on it!
  2. Preheating your Dutch oven to 450 degrees F will not damage it, or the knob on top.
  3. I’ve let this dough rise anywhere between 8-24 hours and it has baked up beautifully. Just make sure it has risen and appears to “bubble” to the surface.
  4. There’s no need to grease the Dutch oven/baking dish/pot
  5. . My bread has never stuck to the pot. If you are concerned though, put a piece of parchment paper under your dough before placing into your pot.
  6. I do not recommend using whole wheat flour or white whole wheat flour in this recipe. The resulting bread will be very dense, and not as fluffy and delicious.
  7. I used a 5.5 quart enameled cast iron Le Creuset pot, but you can use any large oven-safe dish and cover. All of these also work: a baking dish covered with aluminum foil, crockpot insert, stainless steel pot with a lid, pizza stone with an oven-safe bowl to cover the bread, and old cast iron Dutch oven.
  8. Add any mix-ins you like - herbs, spices, dried fruit, chopped nuts and cheese all work well. I recommend adding them into the initial flour-yeast mixture to avoid over-working the mix-ins into the dough. The less you "work" it, the more you're encouraging soft, fluffy air pockets to form!

Did you make this recipe?

Please leave a comment on the blog or share a photo on Pinterest

Join the Conversation

  1. I love a good, no knead, crusty homemade bread!

  2. 4-ingredient crusty bread?!! Yes please! I could honestly make dinner out of this.

  3. this seriously could not get any easier!!!! Amazing!!! x

  4. I love the simplicity of this gorgeous loaf.

  5. I’m so glad you loved this recipe as much as I did Georgia- your loaf looks perfect!

  6. I love crusty bread, so much. This looks wonderful, Georgia!

  7. I’ve been meaning to make this bread for months now! And your post might just be the kick in the butt I need to get around to it! :) Looks incredible.

    Baking your own bread is always so rewarding! I’ve made a similar no-knead bread before, but substituted about 1/3 of flour with whole wheat and didn’t see much texture difference. I know you mentioned not to substitute WW, but do you think you could add in just a bit??

  8. Thanks Laura! You can try a little bit of whole wheat flour, but I still don’t recommend it. Substituting in just a small amount won’t make much of a nutritional difference anyway. :/ Feel to experiment though!

  9. that is one GORGEOUS loaf! I can’t believe it’s as easy as five minutes of your time! The crust is perfect.

  10. Homemade crusty bread is my favorite! This looks incredible, can’t wait to try it!

  11. This looks divine! I’ve been meaning to attempt a recipe like this for ages.

  12. I don’t know whether to be excited or scared that this bread seems so easy to make. For a carboholic like myself, easy recipes can be simply dangerous.. but I can’t say no to such a crusty, perfect bread!

  13. Looks PERFECT! Just like the one’s I buy at the bakery, great recipe!

  14. This does look like magic! Pure, delicious, amazing magic. So totally pinning and making this, and then probably eating the entire loaf, let’s be real.

  15. Yummy! I love making bread, but I’ve never made a no-knead one before, this looks gorgeous and yes those slices look just ready to be slathered in glorious amounts of tomatoes, olive oil… dipped in soup, toasted… and I’m such a carboholic I’ll just eat it on its own! :)

  16. STUNNING! I love how you made it and how delicious, crusty and golden it looks. Fantastic job…had to pin it few times!:))

  17. I could just tear into this and eat plain..i love bread like this…and 4 ingredients i love that even more! beautiful pictures

  18. Made this style of bread a few months ago, and it blew my socks off! Anyone who doesn’t think they can make bread from scratch needs this recipe and tips immediately!!

  19. So I can use a crock pot insert? do i cover that with foil? not sure if the lid will withstand the heat..

  20. The lid won’t, but yes, you can cover it with aluminum foil.

  21. A wonderful no knead artisan bread with perfectly golden crust and open crumb, Georgia.

  22. Oh wow–this looks amazing. I am new to bread making and am totally addicted. making this in the next few weeks for sure.

  23. What a gorgeous loaf of bread! I want a couple warm slices with a bowl of salty butter to swipe them through!

  24. Whaaa!!??? SO SIMPLE! And it looks crazy gorgeous and rustic and super duper delicious!!!!

  25. I absolutely love this! So simple and it looks completely perfect – so crusty and all those beautiful air pockets!

  26. Juli from VA says:

    Just made this for dinner & I’m amazed! It looks just like your pictures! Soooo easy! Can’t wait to throw some butter on this yummy bread!

  27. Isn’t it crazy? So glad you made it and love it! It’s just as amazing with butter as it is dunked into pasta sauce!

  28. There’s nothing better than homemade bread! This looks incredible, can’t wait to try it!

  29. Looks wonderful. Love artisan bread and you got it so perfectly round. I’m so intimidated to make breads like that at home.

  30. Please don’t be intimidated, this one is SO easy! :) Give it a shot!

  31. Last question.. if mixing in rosemary or lemon zest, would you add it when you mix all the ingredients, or before the oven? sorry, first timer with bread..

  32. No worries. Just add your mix-ins with the dry ingredients, before adding the water.

  33. Your bread looks beautiful! Isn’t this the best recipe? So easy and so satisfying. We are due for another cold spell in Colorado, and this would go so well with a big pot of soup. Thank you for sharing!

  34. All I need is some salted butter and I could eat this for weeks.

  35. I am allll over this! What an awesome, quick, way to serve up delicious bread!

  36. Ooh, I have everything I need to make this. Including the cast iron Dutch oven! I think this might be a weekend project for me very soon. :)

  37. Oh-oh-ooooooh!!! This is one lovely loaf… saw me off a slice, please!

  38. Oh girl. You had me at “no knead” ;) I would be in heaven with this bread, some butter, and raspberry jam. And I won’t share!

  39. Oh, I’ve made this bread! It’s scrumptious…especially warm with a pat of butter. Make that LOTS of pats of butter. I’m overdue to make another loaf…yours looks spectacular!

  40. No Knead eh. Sold! I’ll try it tonight!

  41. That is seriously one beautiful loaf of bread!

  42. You had me at no knead. This will definitely test my patience but it looks so worth it! :)

  43. 5 minutes?? No knead??

    I think even I can make this bread! ;-) Sounds so good!

  44. Just pinned your no-knead Artisan bread to my #bread love board on Pinterest, and I’m anxiously wanting to make this real soon. Yours is the BEST so far that I have seen shown on blogs. So gorgeous with the beautiful crust, and light and moist on the inside. Love your photos, as well…superb!

  45. I learned about no knead artisan bread recipe a year ago, and i STILL haven’t made it. With your GORGEOUS bread pictures, I’m completely convinced that I need to do this very very soon. I cannot wait to eat this. Probably first one will be gone right after it comes out from the oven!!! Amazing, amazing, amazing!!!!

  46. This looks absolutely perfect!

  47. I made this a few months ago and yum! How easy and delicious it is. I tried it with spelt flour too and it was great.

  48. This looks so yummy! Homemade bread is always the best and it’s even better when it’s easy to make.

  49. Beautiful crusty artisan bread and no knead-I have to try this recipe..very soon ;-)

  50. This was amazing. I can’t wait to make another loaf.

  51. I made this today. My husband said all you need is a good chunk of cheese and the bread. This recipe is the best one I have tried so far. I baked it in a 4 qt cast iron dutch oven. I will be making more. Thank you.

  52. Can you substitute the dry yeast with fresh yeast?

  53. I’ve never tried it, so I can’t recommend it. But dry yeast should be available at most grocery stores.

  54. I can see my low carb idea flying right out the window. What an amazing bread!
    :-) Mandy xo

  55. Cheryl Blakley says:

    Sounded too good to be true so I had to try it. Have to say, this bread is wonderful. Very crusty on the outside and a wonderful texture on the inside. Thanks so much for this recipe. Will make again and again.

  56. Definitely making this SOON! I’ve got a batch of sour dough starter going right now so as soon as I finish that up no bake artisan here I come!

  57. Such an easy and delicious recipe!!! thank you so much! bwt LOVE your site. kisses from Jerusalem, Israel.

  58. I have made several loaves of bread – and hated them all. That is, until today. It took me 5 minutes to mix it up last night and 40 minutes to bake it this morning. And let me tell you, it is bakery quality awesome bread! Thank you!

  59. Just came across your website from pinterest… I’ve made 2 of your recipes so far (including this one) and am getting ready to make a third… both have turned out SO WELL and delicious. I love that your recipes are easy to follow, tasty, and not too much fuss. This is my new favorite food blog :)

  60. You absolutely made my day with this super sweet comment, Alyssa! Thanks so much for stopping by and letting me know that you loved this bread (and other recipes too). I hope you keep visiting and finding new yummy things to try. :)

  61. Absolutely loved this. Turned out beautifully. I am new to your site and will try many more of your recipes. Love the instructions and photography as well.

  62. I don’t mean to sound like a rookie, but did you put your Le Creuset in the oven. empty?

  63. Hi, Your bread looks amazing!!! My bread came out kind doughy and not very light on the inside Any suggestions.
    Everything looked the same, except when I cut a slice it was doughy and not any holes like yours..I’m gonna try bread flour next. I used fresh ingredients. any help would be really appreciated. Thanks, Mark

  64. If you followed the ingredients and directions exactly, my best guess is that the bread simply didn’t rise for long enough.

  65. Renee Borello says:

    Baked this bread today! The crust is perfect, so crunchy. A big hit with the whole family! Thank you!

  66. My bread stuck to the parchment paper on the bottom. :(

  67. I made this today and I added Rosemary and lemon zest and it was delicious! How do I get those marks that are on top of your bread? It looks like two lines crossing one another?

  68. So glad you enjoyed it! I scored the dough crosswise with a paring knife before baking to get the marks but there’s no guarantee that they’ll show up exactly like this on your bread.

  69. Hi, I have had success with this recipe. Thank you very much!!! I have a question…I like semolina bread and I was wondering if I add one cup of semolina flour to two cups of regular flour, would you keep the yeast and everything else in the recipe the same? Or is there something different about semolina flour? Thanks for your advice or help.

  70. Most likely the yeast would stay the same, but I really don’t know as I’ve never used semolina flour in this bread and can’t recommend it. With semolina, you might end up with a tougher, chewier bread. Best to keep the ingredients the same for best results!

  71. ALWAYS let the bread cool before cutting it. This is a fool proof recipe…my husband makes it ;-)
    He has gotten to be a great “slasher” . He can now score the bread to give the most attractive crust ears EVER! I like to try different scoring patterns.

  72. Great recipe! For cast iron users,, I toss a little cornmeal in the dutch oven and add caraway seeds to the recipe and it kicks a$$.

  73. I am very excited to try this beautiful bread, and am wondering what mix ins have been successful. Would roasted garlic or cheese, maybe, be too heavy for this dough, or do you think “anything goes”?

  74. I just prepared this last night and baked it today. I am dumbfounded!!! This is AWESOME!!! I will never have to buy Artisan bread at the bakery again. So delicious and absolutely foolproof! Can’t wait to do it again. Thanks for sharing such a great recipe!

  75. Those mix-in’s sound great to me! I have more suggestions in the post.

  76. A follow up to my comment earlier- I baked a loaf with sun dried tomatoes and fresh basil, stirred in before adding the water, and it was GREAT. It was only a half loaf (or half the recipe, so a small loaf) since I didn’t realize until I got fired up to make this that I was almost out of flour. Even that didn’t diminish it’s greatness. It just disapearred faster.

  77. HI Georgia, this bread looks fantastic! I’ve been wanting to try bread in a dutch oven and I’m keeping this recipe. The bread looks just like what I get at Whole Foolds. Great post!

  78. I stand with everyone else in awe of this recipe. When I looked at the bowl of foam mush this morning I never believed it would turn into anything edible let alone amazing.

    Cannot wait to try add ins and make again using what I learned from this loaf. Next time I will let rise longer and start my oven hotter ( I knew it ran about 25 degrees off but wanted to try the first one without adjusting anything). It turned out a little denser that I would serve to other people but my husband and I inhaled it.

    The crust is just amazing! So crispy but not too hard or tough. I told him we can never make this again when we are the only two eating it!

  79. Elizabeth Moad says:

    This bread is amazing! I have made it twice in one week and I’m sure it’s going to become a very frequent staple in my house. Easy, delicious absolutely wonderful! Thank you so much!

  80. Phenomenal results! Exactly as promised. Totally amazed at how simple this recipe was. My next attempt might be to let it rise a liittle longer, I did 8 hours. I might reduce my oven slightly & bake a little more. Slightly doughy but beautiful in texture, taste & color. Thank you for an awesome recipe!

  81. Charle Anastasia says:

    I just made this bread… Awesome… I made extra loaves for my Thanksgiving Bread bowls… they’re so beautiful. Thank you for the recipe. Super easy.. foolproof, and perfect for the baking challenged like myself LOL

  82. I love you recipes. My 9-year old likes to try your recipe as well :)

    Question: I have 4 1/2 qt. LC pot. Would it be big enough, or should I use other method you mentioned under your ‘Note’?

  83. Venice Mitchell says:

    Just did this today. It came out looking great. This is my first time at this type of bread but I was pleased for first timer. It seemed a little dense. Definitely a hearty bread. I think my oven temp I need to work on. Didn’t come out as brown as I wanted but it was good. Practice makes perfect, I always been told, Lol
    Will try to Pin pictures of it that I took to go onto my Board, and any helpful comments on the baking process will be appreciated. Thanks

  84. A 4 1/2 qt. pot would most likely work fine. Just look at the size of your risen dough before baking and use your best judgment.

  85. Christianne says:

    My only concern would be the knob of my LC pot. Can it withstand the heat. I have made this a couple of times by removing the knob, and then covering everything with foil followed by the knobless lid. But sooner or later, someone in my family will misplace the knob. I would prefer to keep it altogether but am nervous.

  86. Don’t worry, it won’t melt off or break! It’s fine with the knob.

  87. I’ve made this delicious bread about 8 times now. Several times for parties. I’ve mixed in rosemary and butter and salt the top during the midway mark. It is scrumptious. People keep telling me they are craving it, so it will be in their gift basket for christmas. Thank you so much! PS it is soooooo easy!

  88. Joyce Perdue says:

    Made this yesterday and was so thrilled with it. My loaf looks just like your picture. I make all our own bread and deserts and this will be made regularly…..at least twice a week. Also made my homemade spaghetti sauce that simmers all day and is a real favorite…..this bread goes perfectly with the spaghetti.

    Did not have the pan you have so used my crock pot that is glazed and used foil on it as someone suggested and it worked fine. My husband was impressed with this one.

  89. I’ve used this recipe and was quite pleased with the results. Only problem is putting the dough in my very hot dutch oven without getting burned, and removing the bread in a timely way, also without getting burned.

  90. Diana Leonard says:

    I made this for Christmas dinner. IT WAS SO AMAZING! THANK YOU! This is now going to be a staple in my house. I put rosemary, olive oil and kosher salt on top after I took the lid off for the last 7 minutes. YUM!!!

  91. Any suggestion for making smaller loafs? I would like to make bread bowls for soup.

  92. You can just shape the dough into smaller loaves and watch closely as you bake. They may require less baking time.

  93. Hi, I made this bread and OMG was it great. I let it rise for six hours because it was tortuepre waiting the full eight. It was marvelous. We will be using male butter on this bread in the future.

  94. This is INCREDIBLE! I can’t believe I made it. I really don’t like working with dough, but I love *good* bread. Rarely do I find bread with a fabulous crusty outside and a chewy, wonderful inside. WOW, this nailed it! I started it this morning and had it with dinner. I let it rise for about 10.5 hours. I did made some significant changes because I didn’t have the said ingredients on hand. Rather than 3C all purpose flour, I used 3/4 C all purpose, 1/4 C whole wheat and 2 C bread flour. I also added chopped, fresh rosemary (didn’t measure, just eyeballed it). I am both elated and in fear about this bread. I LOVED it. But I’m afraid I better just kiss that idea of losing 10 lbs. goodbye.

    Thank you (I think!) for this recipe. You made my day happier. :)

    P.S. Mine turned almost exactly like your picture, except with rosemary and a little bit flatter (probably because of the difference in flour).

  95. Can this recipe be doubled? I love that it is so light when done rising…Thanks SO much for your post!

  96. I’d suggest making two separate batches (in two different bowls) as opposed to doubling the ingredients.

  97. I tried it today and I couldn’t believe the result! Wonderful!!! It looked exactly the same as on your pictures. Husband and son LOVE it.
    Thanks for sharing!

  98. Hi, thanks for the recipe. KIndly explain how much is a cup in your terminology? 200 ml? I presume that the cup you use for flouw and water is the same size. Have you tried this recipe in a breadmaker?
    thanks in advance,
    Egle

  99. Liquid and dry measurements are entirely different. You’ll want to search for a measurement converter on Google to find the conversion you’re looking for. This recipe wouldn’t be suited for a bread maker since a bread maker kneads the dough, and this is a no-knead bread.

  100. Just made my very first loaf of crusty bread! It looks great except for the following. The bread is “doughy” on the inside and too much flour on the outside. I think I rolled it in the flour too much while forming into a ball. I followed the directions perfectly. I used an Xtrema ceramic pot to bake in. Do you think the temperature was too high? that I need to bake longer with or without the lid? I must admit, I did cut into it before it was totally cooled…. I was very anxious.
    Please help me to get that perfect loaf. I am so excited about this finding this recipe.

  101. I’m not sure exactly what went wrong, but by the sounds of it you used too much flour and overworked the dough. It’s very important not to handle it too much, so as to allow those light, fluffy air pockets to form.

  102. I’ve now used this recipe twice and I (and my hubby and 22-month-old) are huge fans. I, too, am amazed at how easy AND delicious it is! Usually bread is either difficult and delicious OR easy and so-so. But this is almost miraculous in its perfection! I did experiment a little bit with my second loaf – I used 3.5 cups of flour and increased the yeast to a full 2 teaspoons. The dough looked almost exactly as the first batch (your recipe posted here) after the 8 hours of rising, but then it was a bit easier to manage when forming into a ball, and actually baked a little taller/rounder without losing that airy center too much (it wasn’t AS bubbly I will admit, but still quite light).

    In summary, this recipe has changed my life. Haha! Thank you SO much for this! I will probably make a third loaf tomorrow, with fresh rosemary added. Yep, that will be the third loaf in 5 days. Don’t judge…. :)

  103. Didn’t read the amount of yeast to use, just assumed the recipe called for an entire envelope. Any idea what will be my end result? I’m so disappointed in myself! Ugh!

  104. Not sure, but an entire packet of yeast has about 3 teaspoons (1 Tablespoon), which is over double the amount called for.

  105. Even though I used way too much yeast, the bread turned out delicious. Made it a second time “the right way” and the end result was very similar to the loaf made with too much yeast. I guess the moral of the story is it’s hard to mess up this recipe. My family and I loved this bread!

  106. Just made my first loaf and I want it to last as long as possible. How would you recommend storing it?

  107. I’d suggest wrapping it in plastic wrap and placing in a plastic bag. Stored this way, it should stay fresh for 2-3 days, though may not be as crisp.

  108. This looks delicious! Is there a way to make it gluten free? :)

  109. Do you have weights for this recipe?

  110. If you need measurements in grams, you can easily input them into a measurement converter found online.

  111. No, sorry, I’ve never experimented with gluten free flours in this recipe.

  112. Mine came out beautifully! Looks just exactly like your photo….so impressed. I followed the recipe exactly and its perfect. My only warning? DON’T use your crockpot lid! I should have known better. Mine is glass, with a plastic handle, which of course, melted :(
    I made two loaves, one in my crockpot insert and one in a large stainless steel, heavy bottom stockpot. Both came out beautifully. I did use parchment paper, but didn’t need to. I will most definitely make this again…..thank you! :-)

  113. I found your website with a google search and I was going to make this for a friend. I didn’t read the directions first (as usual). So, while this was rising, I made them something else. i finished the bread today and it’s almost gone! My family loved it. My husband was quite impressed. At first he thought I bought it somewhere…….

    Thanks for the recipe!

  114. Nathan Benson says:

    Great Recipe but it did stick to the bottom of my Le Crueset enameled dutch oven. So much so I had to rip it out of the pot and it left a layer of glued bread to the bottom that was so hard I had to soak overnight. I highly suggest using a bit of butter or oil on the bottom to prevent this. Other than this great recipe and it went fantastic with my homemade Gouda.

  115. I made this bread this morning and it turned out perfectly! So easy and trying hard not to eat the whole loaf in one sitting!

  116. For those who have problems with the bread sticking to the pot……i sprinkle flour in the hot pot just before adding my dough………hasn’t stuck yet. (i use an enameled cast iron dutch oven.) We haven’t bought bread in months but sure buy alot of bread flour these days! lol :-)

  117. Hi there. This recipe sounds absolutely delicious. I’ve got the dough rising in the airing cupboard right now. So looking forward to lovely fresh bread with dinner tonight.. Just a quick question: can you keep the dough in the fridge once it is risen but before you bake it? Thanks!

  118. Hi Jules – I wouldn’t recommend refrigerating the risen dough; it could deflate and not bake as fluffy. Just go ahead and bake once it’s finished rising.

  119. I have made this many time now. I have given the recipe to many of my freinds and relations. My son is making it with part whole wheat and I just made it with rosemary and greek olives. It is the best find. I gave it to a teach of cooking at my school and she said she wanted to kiss me. It was the recipe she has been looking her whole life for. Pretty impressive.

  120. I made this yesterday and it was as easy as you described. Mine looked exactly like your pictures and it tasted amazing!

  121. Baked this for the first time this afternoon. YUM! Turned out great. Will definitely make this again. I used bread flour & won’t sub any other flour, it was delish!

  122. Looks amazing! I can’t believe how simple this is

  123. Hello ,
    You recipe is really wonderful as I tried many recipe of tartine bread as to get big hole crumb but failed till tried your recipe and got irregular holes , nice crumb even I lived in Bangkok where is somewhere around +98 degree F, humidity 44 . I left the mixed dough on counter overnight (8 hours) and pop in fridge in day time (12 hours) , pre-shaped and baked last night . I told my daughter this is the best no knead bread I’ve ever made. Thxx.

  124. I wanted a different kind of bread to go with the soup I made for supper and this was the perfect bread for that! This recipe went into my binder to make again. Chewy and crusty on the outside, and super soft on the inside. I used my slow cooker crock and covered it with tin foil. Thanks for the recipe!

  125. I’ve been making your recipe for a while it’s always at hit..today I added a home made lilac jelly to spread it was fabulous

  126. Martha Mac Donald says:

    3rd time today, and just felt like I had to write…I’m a regular bread maker (most every day) and just tried this for fun because of the cooking with a lid part…but I’m definetly amazed, as it is really, Really good! The crust is, well as others have said, Wonderful! Giving this recipe to my daughters today…think they’ll thank me for it… So thank you!

  127. Just found this recipe a couple of days ago. Made exactly as written in my LeCrueset 5.5qt Dutch Oven. It turned out amazing! Thank you so much! And as for storing, I didn’t use parchment paper in my LC, but I did wrap the bread in it to store, and it kept very well.

  128. I was SO excited to find this recipe the other day… this is like the best thing ever! Sadly, I don’t think it’s for me. :( I have tried twice now, and both times I couldn’t get the dough to form properly. It’s too runny, like the consistency of Bisquick batter. I guess it’s because I’m at somewhat high altitude (western NC mountains- 2650 feet above sea level.) The second time, I tried the obvious and added more flour, but it still didn’t work. Based on an online source I found for high altitude, it suggested adding another TBSP of flour for my altitude, and I ended up adding 6 extra before the dough appeared anywhere near your picture. I’m sure all that trial left me with a way overworked dough as well. Still, after the rising period it was way too runny to form a loaf. I really want to make this work, but I just have no clue what I’m doing. :(

  129. This bread is amazing! Made it for the first time 2 nights ago and it’ gone. My 5, and six year olds LOVE it too! I know have two bowls that will rise over night. I love your site…found it via Pinterest!

  130. When I saw how easy this was to make I couldn’t justify going to bed without putting this together for the next day. I made a half recipe (because I’m, unfortunately, the only one who appreciates good bread in my house haha), and it turned out nice and crusty with a soft center. I did cook it too long, forgetting that I halved the dough. Still, looked very similar to your picture and satisfying! Might use less salt next time (I used 1 1/2 tsp), and maybe add sugar? Can’t wait to make again.

  131. Just to comment about altitude… I’m at over 4500 feet in Arizona and had no problem with the dough. I used bread flour but you have to be sure you have good yeast! Makes all the difference. I find that I just need to lower the oven temp for most baked goods (to avoiding burning/over browning).

    I did want to find out, however, if I should cut the top of the loaf before putting it in the oven.

  132. Can you double the recipe for a 5 quart Dutch oven. My 5 quart Dutch oven just seems so bigfor the small amount of dough

  133. The dough fits in the Dutch oven as shown in the pictures. Once baked, it rises to fill the oven almost completely. I wouldn’t recommend doubling the recipe.

  134. I made this loaf this morning, having mixed it yesterday afternoon. It came out perfect. It’s the easiest white loaf ever. I used the plain white flour that i use for dakes, not a strong flour/ bread-making flour.

    The quantity of dough was perfect for myLe Creuset casserole dish.
    Lee H, New Zealand

  135. Can the dough sit longer than 24 hours ? I made the dough, covered it with a kitchen towel, because I had run out of clear wrap, and I have not had the chance to bake it yet.

  136. I’ve never let the dough sit longer than 24 hours, but I wouldn’t recommend it. Your results should turn out fine if you bake within a few hours of the 24-hour mark, though.

  137. Thank you Georgia ! I threw that batch out and will start afresh. I’ll know better next time.

  138. I’ve made this twice now and the results have been great. But getting there has been a struggle. My dough is always really sticky and wet after rising, to the point where it’s impossible to get into a neat little ball. I’ve used epic amounts of flour and it doesn’t seem to help because the dough just keeps absorbing it and making a dense loaf, what am I doing wrong?

  139. Hi Sarah – I think you need to let it rise longer, or use a little less than 1 1/2 cups water in the dough. I’ve made the bread dozens of times as written, with the same results as shown every time, so I’m not sure what could be going wrong for you. But, your amount of time rising may have an impact. Also, to rise doughs, I usually place them in a warm oven which I’ve preheated to 200 degrees, then turned off before adding the bowl of dough. Hope you try it again with better results!

  140. Hi Georgia,
    As I am a retired chef and have been in the industry for over thirty-five years I have to compliment you on a wonderfully easy loaf of delicious crusty bread! The hardest thing is waiting for it to finish rising and baking! But oh so worth the wait! I’m making two or three loaves next time! :)

  141. I have tried this once, and the results were fantastic. (My second try is rising now). I did find a very similar recipe with whole wheat flour, and it turned out a little denser, but still good. For those of you without a dutch oven, I just used a plain old pyrex casserole dish (without parchment paper) and it turned out just fine!

  142. Krista Ohmayer says:

    Hello,
    I have made this several times and I have shared the recipe on Pinterest with all my friends who cook! I was wondering if I could use a different kind of liquid? I was thinking maybe carrot juice for a fall coloured bread for Thanksgiving.

  143. I wouldn’t recommend using any liquid besides water, but for a fall/winter bread, dry herbs such as rosemary and thyme would work well!

  144. Yes! So simple and delicious! I love the crispy crust and the soft inside. Thanks for the recipe. I am a complete carb addict and this really hit the spot! :)

  145. Hi Georgia,

    Have you ever used the Emile Henry bread cloche? I am going to make two loaves, one in my Emile Henry stewpot and the other in the bread cloche.

    I am trying to figure out if I need to pre-heat the cloche plate only or the entire thing.

    Thanks!

  146. As long as it is oven-proof, I would preheat the plate only.

  147. I’ve made this 5 times in the last 5 weeks! Let’s just say my family loves it – A LOT. We’ve decided to have soup on Sunday’s just so we can have this bread. I think I’m going to add some garlic and oregano for the next loaf and see how it turns out. Thanks for this recipe.

  148. Can this bread be made using gluten free flour? Such as rice flour?

  149. great recipe! I ended up using 3 1/2 cups flour and it was perfect. I made 2 loaves, 1 round and 1 oblong, making 2 separate batches. They look like a picture. Love your blog Georgia!

  150. I wouldn’t recommend using any flour other than all-purpose.

  151. Just made this, WOW, nice thxs, I used pink Himalayan salt instead of kosher. I will be making this again, thxs again!!!

  152. This is actually the first blog review that I’ve ever left, but this recipe was SO good, I would feel guilty not shouting THANK YOU FOR POSTING THIS! I made it yesterday and it was EASY, so EASY and the bread was beyond delicious. Crusty on the outside, soft in the middle, just like something you’d pick up at a bakery. I will never buy artisan bread again, because I can make it from home now, using better ingredients that any crap at the store. I can’t wait to try mixing it with different spices. My husband is a chef, very critical of food in general, and he LOVED this bread! I have already passed your blog link on to several people. Thank you again for sharing such a great recipe!

  153. Has anyone used a Cuisinart Dutch oven? I’m a little concerned about the temperature for the lid. I was just wondering if anyone has tried it. I’d hate for the know on the lid get damaged with the 450 temp. Instructions on my pot say lid oven safe upto 350

  154. As long as your Dutch oven is cast iron, it will not become damaged. If you’re concerned, you can always cover the pot with aluminum foil instead. Hope you enjoy!

  155. This was the first recipe I have ever tried and my first loaf of bread.. it was simple to prepare and came out PERFECT! You have to try this crusty bread recipe!

    Thanks,
    Dave

  156. Thank you for leaving such a thoughtful review of my recipe, Melina! I’m so glad you and your family enjoyed this bread. I hope you make it again and again (like we do)!

  157. Just putting my two cents out there . . . I only use White whole wheat, or regular whole wheat mixed with the white . . . It’s never come out dense. Comes out amazing! I haven’t used this exact recipe, but another very similar. And when in doubt . . . experiment :-D

  158. paintslinger says:

    There are so many times when crusty bread would be perfect with a meal. I would like to make this recipe into smaller loaves so we have fresh bread each time. Would I make separate loaves after mixing the ingredients but before rising then placing in the freezer? Would I need to increase the amount of yeast or adjust any of the ingredients? I’ve never made bread before so any help would be appreciated.

  159. I’ve been told by other readers that it forms/rises/bakes very well as separate smaller loaves (using same ingredients but probably slightly less baking time). Since I have never tried this myself, I can’t vouch for exactly how it will turn out. However, it’s worth a try! I would just follow the ingredients and directions exactly, decreasing baking time if needed. Hope it works out for you, and feel free to report back!

  160. Wow. I never knew making bread could be so easy! My fiance and i love fresh-baked bread from the local baker, and I bet I could fool him into thinking this was from there! Thanks so much for sharing such a simple delicious-looking recipe!

  161. This would be a dangerous bread for me to have in the house. I’d eat the entire loaf in one sitting!

  162. Joanne Kilburn says:

    I have made this bread three days in a row. It is so easy and tastes incredible! The ingredients mix together quickly and you just leave it alone to do its thing. The first batch, I let rise for 9 hours; the second batch I let rise for 24 hours; and the third batch I went back to 9 hours. I didn’t really taste a big difference between the two rising times. It is so easy to throw together at night, let the bread rise while you’re sleeping and wake up to fresh baked bread. Love.

  163. cande darling says:

    Just made the bread. It was easy and great. Making another now and will bake it in the oven in morning. Put caraway seeds in this one. Thank you for your recipe. The other breads, take all day to make.

  164. Hi Georgia, this is a fabulous recipe that even I can make successfully. My wife is so impressed. Thank-you so much.

  165. Hi Georgia, Thank you for sharing your recipe, it looks great ! I have two questions, one is I have instant yeast instead of dry acting yeast, will that make a difference and do I need to reduce the amount of instant yeast? The second question is, do I need to have the water a certain temperature or does that only matter if you are using a starter? Thanks!

  166. As long as it’s a dry packet of yeast, it should work fine. No need to reduce. The water temperature doesn’t need to be specific, just on the hotter side of warm.

  167. Any suggestions on how to make this a sourdough recipe? Reduce the liquid? Or reduce the flour? Mine first loaf Is rising right now. Thank you for the excuse I needed to buy a Dutch oven!

  168. I’d like to add jalapeño and cheddar cheese. Do you know how much of each I would add?

  169. You can add a small amount of jalapeno slices, but I wouldn’t add cheddar cheese to the dough, as the fat in the cheese might influence the dough’s texture. You can sprinkle some on top of the loaf as it bakes uncovered, though.

  170. I have made this bread many times and it has come out perfect every time (does a little dance). It is a hit with the whole family I even brought this once to a huge family gathering as a side to my homemade soups and everyone gobbled it down. The patience of letting it rise really pays off! (Side note i did use bread flour)
    I would like to make a rosemary version how much would you recommend? I’m using dried and I really want the rosemary to pop! Thank you so much this recipe as an admitted carb queen I’m in love!

  171. So glad you’ve had great success with this recipe, Shanti! I’d say probably 1/2 tsp. dried rosemary added to the dough would be best for a rosemary bread.

  172. How large does it rise? Ie, how large is a ‘large bowl’? Is a 14-cup/3.3 liter tupperware sufficient?

  173. You can see my step-by-step photos for a reference of the bowl size. Any large mixing bowl will do. Mine don’t have sizes but I’m assuming 14-cup is sufficient.

  174. Graham Chillingworth says:

    This recipe is ideal for the beginner. I love the rural crustyness of the outer shell and the fluffy interior, ideal for soups and lunches. I found that making this exact recipe (ingredients, timing and temperature) in the form of rolls works equally as well. I took the dough from the recipe and divided it into ten equal portions and once cooked and cooled I froze them and when required I thawed and then warmed them for 10-15 minuters in the oven at 170f, the original texture was returned. Now I have bread at my finger-tips whenever I knead it

  175. Tracy Kelly says:

    Hi! This is a delicious recipe and so easy!!! You should try it with an “everything” topping (caraway, kosher salt, flaked garlic, flaked onion and poppy seed). My family cannot stop eating it. I think I make 3 loaves a week. :-) Great as toast under a poached egg.

  176. I am new to bread baking and live at high altitude in Breckenridge, CO (10,000 ft) Needless to say I felt my odds for failure were high, but I followed the directions exactly and it came out perfectly. I think the low yeast, slow rise method allows this to work at high altitude without adjustment. Thanks for a great, easy bread recipe!

  177. Lorri Powell says:

    As its baking the bread looks and smells delicious, but I have a couple of questions. How long do you leave it in the pan to cool after its done baking or do you remove it from the pan immediately after taking it from the oven? And has anyone tried making this a breakfast bread by adding cinnamon/ or raisins?

  178. I usually remove the bread from the oven, then the pan and place it on a wire rack to cool. Adding cinnamon and raisins is a great idea. I wouldn’t add more than 1/2 teaspoon cinnamon to the dough, though.

  179. This is ridiculously easy! I couldn’t believe how delicious this was. My boyfriend and I polished off the whole loaf the night I baked it. I am going to experiment with a double batch and longer baking time for a larger loaf. I used my Pampered Chef Deep Covered Baker and the results were divine! It didn’t stick to the stoneware. Crispy and golden on the outside and chewy on the inside. I will be making this once a week!

  180. Aggie - December 18, 2014 says:

    5 stars
    Georgia, I am in love with this bread & I haven’t made it yet. I want to make it in my crockpot insert but is it not possible to bake it in the insert in the crockpot itself or is that too moist of an environment? The problem is my oven has been broken for 3 yrs. now so we bought a convection toaster oven which has a few hot spots. Would it cook ok in that or how about the grill where we have cooked our hams & turkeys the last 3 yrs.? Any help would be appreciated! Love your website, think I’ll be using it a lot!

  181. Your crockpot insert would be fine for baking, just don’t cover with the crockpot lid before baking. I would cover it instead with aluminum foil or another oven-safe cover. I’ve never tried grilling it, so couldn’t guarantee success with your grill, but it sounds like an interesting idea!

  182. 5 stars
    This is seriously THE SECRET. I am blown away. I followed the instructions exactly and got a perfect crusty delicious amazing loaf. Thanks so much for this recipe, it’s a real game changer for me (:

  183. 5 stars
    This is my new go-to bread! Or rather, has been for weeks. I changed operating systems on my computer and lost the bookmark to this recipe and couldn’t remember the name of the blog so really had to exercise my google-fu to find it again!
    I made it exactly as the recipe says the first time, with spelt and forgetting to shape it the second time (I just put it straight from the bowl into the dutch oven because I was sleepy and not paying attention to the recipe) and all other subsequent times spelt and following the directions. It has been perfect each time!

    Thanks for sharing this recipe :)

    (oh and happy new year!)

  184. I can not find my dutch oven, but I read here that other are using crock pot inserts.
    If I use the crock pot it will not break…correct? Temp is still the same? And I just cover it with foil?

  185. Correct, your CrockPot insert should not fracture at the high temperature, and you can cover it with aluminum foil. The rising and baking times will remain the same.

  186. 5 stars
    Thanks for this post , I live in California but I’m in new York state visiting family. this is a great excuse to
    pull out my underused dutch oven. I came across this recipe last night it took two minutes to throw together and was ready to use by lunch today nothing like home made chicken soup and hot bread. Thanks again.

  187. 5 stars
    Thank you so much for this recipe! I have always wanted to make my own bread but every recipe I’ve tried hasn’t turned out like I hoped it would. I tried this on a whim today and it was AWESOME. I think I will make another loaf tomorrow!

    All I had was a 12 quart stainless steel stock pot. I was a little nervous it would not work in this because it was so deep but it was fine. I also realized at the last minute I was out of parchment paper. I used aluminum foil lightly greased with olive oil and it worked very well. The bread did not stick at all and did not get overly brown on the bottom.

    Thanks again! I can’t wait to make a second loaf…and third and fourth….

  188. 5 stars
    Made this bread today and it is fantastic! I couldn’t wait to cut into it! I mixed it up yesterday with the intent of baking it for dinner but decided to go out and watch the NFL playoffs with friends. I was worried about the 24 hours, but it was right on! Next time I will add an herb and/garlic. Thanks for the great recipe!

  189. Have you used bread flour with this recipe?
    Would you recommend using bread flour for this recipe?

  190. I have not used bread flour for this bread before, so couldn’t guarantee success with it.

  191. Steve kellner says:

    I had some extra sourdough starter so I so substituted starter for yeast. I did not weigh the starter but would guess about 8 oz. I let it rise about 12 h. It ended up a little soft because I did not add enough extra flour to make up for water in starter…but the bread still came out great. Lots of holes, nice crust, and chewy sourdough flavor. I’ll definitely do it again.
    Thanks

  192. 5 stars
    OK!!! I’ve been trying to perfect “Bronx Arthur Ave Bread” for a couple years now and I’ve tried different flours, yeasts, adding sugar,spraying bread in the oven to build nice crust and perfecting kneading with good results. Then I saw this recipe and said no way, I take pride in my kneading technics. Well I tried it and WOW I mean WOW, REALLY how can this be with no kneading…It looked great but I was concerned about the crumb, again how can this be delicious! No picture as I had just made my ricotta gnocchi with a pomodoro tuned into a cognac with cream! Honestly one of the best bites I’ve ever put in my mouth! But I have a few questions, you say Active Dry Yeast,” which is what I used” but that needs to dissolve in warm water? Where as Rapid Rise Instant Yeast does not. But I followed your recipe exactly and it came out great, I just don’t get it? Could you shed some light as I’m not a chef, just make some really good food from time to time…thanks Dan

  193. 5 stars
    Thank you for this recipe! I have been searching for an eternity for a good bread recipe, and thought I couldn’t do no-knead because I didn’t own a Dutch oven, but when I saw the suggestion to use a crockpot insert (I cover mine with aluminum foil), I realized I, too, could have crusty, delicious bread at home!

    This bakes up beautifully. I love it plain, and have also added a small block of sharp cheddar cheese when mixing the ingredients, and that also comes out phenomenally well. I bring it to dinner parties and everyone wants the recipe. I always direct them to this page! So thank you thank you for helping make my life a bit easier and tastier!

  194. 5 stars
    Just finished baking this bread recipe…wow ! Will recommend this to friends and family.

  195. Can the recipe be doubled for an even bigger loaf???? can’t wait to try this it looks amazing, thank you!!!!

  196. You can certainly try, but I’ve never doubled this recipe so I can’t guarantee success. Best bet is to make two loaves.

  197. 5 stars
    I’ve made this recipe several times and I’ve always doubled it. It comes out even better looking! I bake it in a 6 qt cast iron pot and it is beautiful every time, always a request at family gatherings!

  198. 5 stars
    I have been making bread for years and I have to say that this is the most fabulous loaf that I have ever baked!! I didn’t have enough plain flour so took a chance and used my Leckford Estate strong bread flour. I mixed it as per instructions (except I used a teaspoon of dried yeast as it was different flour to the recipe) at midnight last night and by 10am this morning it had risen right to the top of the bowl and was covered in bubbles. It almost seems counter intuitive not to knead it but a few shaping movements gave me a lovely soft loaf. I put it in my Le Creuset large casserole and then into the top oven of the aga with the grid shelf on the floor of the oven. When I got it out I couldn’t stop looking at it; I have tried for years to emulate the crust on an artisan loaf and now I have!! Thanks so much for the recipe.

  199. 5 stars
    Wow, this looks great! I just read this, counted up 8 hours and hopped up real quick to throw it together, it’ll be ready just in time for dinner! Looking forward to mixing in rosemary and roasted garlic cloves, or olives and thyme in the future! Thanks for a great recipe!

  200. 5 stars
    I’ve made this about 4 times now. If anyone has not tried this recipe just do it! It’s amazing, easy and definitely a go-to in my home.
    Thank you!!

  201. 5 stars
    Thanks for this amazing recipe! I loved the texture but was wondering if I could reduce the salt? I used 2 tbsp of pink Himalayan salt because I didn’t have kosher salt. How low could I drop the salt and still maintain the bread structure?

  202. Reducing the salt shouldn’t affect the bread’s texture, so reduce it as much as you like. However, make sure you are using a coarse salt, not table salt. Enjoy!

  203. hi! Love your recipe! What can I use instead of dutch oven. Could I use any baking pan?

  204. Additional baking dish options are mentioned in the “Notes” section of the recipe.

  205. On the package of dry active yeast it says to mix with warm water and sugar. Do I need to do this? I didn’t, but want to make sure. I added kalamata olives and rosemary but after I already mixed the dough. Oops! It’s rising now. Thanks.

  206. No, you don’t need to mix the yeast with warm water and sugar ahead of time.

  207. 5 stars
    Thanks for answer about yeast. So I let dough rise for 18 hours and put the dough on floured surface to form ball. It was super sticky and just kept flattening out. I had flour on my hands. I kept trying to get it to hold its shape but was afraid I was going to overwork the dough, so I just got it in the pan and its in the oven now. I’ll let you know how it turns out. Any ideas what I might have done wrong with the dough. Should I have added more flour? Thanks. Laurel

  208. 5 stars
    The bread is delicious!!! I used 2 1/2 tsp salt but probably could have used less because of kalamata olives I added. Cooked for 7 minutes with lid off and it browned beautifully. Even though the dough was very sticky and hard to shape into a ball, it still formed a lovely loaf. I am totally impressed with myself!!! Thanks for your yummy recipe. Laurel

  209. 5 stars
    This has become my “go to” for making a good impression! Everyone who tastes it has been asking for the recipe! Do you have any pointers for making this on a Big Green Egg?

  210. I’m so glad you enjoy this bread! I’m not familiar with the Big Green Egg, but I have only ever baked it in my oven, so can only recommend that method for best success!

  211. 5 stars
    I have been making this bread now for about two months – and had to send a message of Thanks! My family absolutely loves it. I haven’t bought bread from the store since. Today I’m trying a cinnamon/raisin version for the first time. :) I saw someone else ask about bread flour, that’s all I use now (started with reg flour) and it turns out fabulous.
    Thanks a million for sharing this recipe. I’ve lost track of how many friends I’ve passed the link on to, once they saw me post pictures of my success on FB.
    Cheers!

  212. 5 stars
    Thank you so much for sharing this recipe! I had been trying different recipes for months trying to perfect a great artisan bread and just couldn’t get there. It is a masterpiece of beauty and excitement every time I take a loaf out of the oven. I love the flavor especially and finally have the big crumb I was looking for! I think I will try the honey whole wheat oatmeal next. Thanks so much!

  213. Hi,
    Do I need to use BREAD FLOUR ? is there any advantage ?
    sounds wonderful & using regular all purpose four sure helps…I’d like to make this while my g’kids are here next week.
    thanks for the advise

  214. I’ve only ever made the recipe as written, so I cannot advise on bread flour. However, another reader said they used bread flour with great success. Good luck!

  215. 5 stars
    This is an AMAZING recipe. Seriously. It’s crazy easy and the results are incredible. The night I baked my first batch, I ended up starting TWO MORE BATCHES to bake the next morning for a family function! I can’t wait to share it (and show it off)!

  216. 5 stars
    GREAT recipe! I prepped this on a Thursday night and it baked up beautifully on Friday morning. Somehow I managed to stop myself from eating the whole loaf in one sitting and I used the leftovers for crostini on Saturday. I will make this bread again and again and again… Delicious! Thanks!

  217. bill muto says:

    I used to make a French Peasant bread which is a kneaded item and always used a tablespoon of ground cumin that gives the bread an earthy flavor. Tried it with this no knead recipe and it was great. Also add a Tablespoon or two of grated onion for another taste treat. The only way to go from now on.

  218. Can I add whole garlic cloves into the mixture and let them roast in the dough while it bakes?

  219. Sure! I would add the cloves to the dry flour-yeast mixture before adding water and rising. Just make sure you don’t handle the dough too much, otherwise the big, fluffy air pockets won’t form.

  220. 5 stars
    Georgia – Wow! This is an amazing recipe. I love artisan bread, and have attempted numerous times to make it. It always came out too dense. I about gave up, and then came across your recipe. Perfection on the first attempt! Not only visually appealing, but tasted great – soft, airy inside, with nice crusty outside. And I didn’t need to get the mixer out to make this. Followed your directions to the T, and I believe anyone who does this will achieve that same results. Thank you so much again for sharing this.

  221. 5 stars
    I was so skeptical of how this could turn out. Mixed it up before going to bed and baked it the next day. It came out of the oven exactly like your picture! Delicious with a big pot of homemade soup! Will definitely bake this again & again & again….

  222. Moe Wood says:

    5 stars
    I have my first batch of dough rising on the counter. I live in Alberta at an altitude of 3,800 feet in the foothills of the Rocky Mountains. All of my bread recipes that I previously made in Calgary don’t seem to work here – I have tried all the different suggestions for using less yeast and added vital wheat gluten etc., but so far have only produced a dense dry bread, so I’m hoping this recipe will be the charm! Any suggestions for adapting it to a high altitude? Thanks!

  223. Hi Moe – I thought you might like to know that another commenter wrote as follows:
    “Just to comment about altitude… I’m at over 4500 feet in Arizona and had no problem with the dough. I used bread flour but you have to be sure you have good yeast! Makes all the difference. I find that I just need to lower the oven temp for most baked goods (to avoiding burning/over browning).”

  224. 5 stars
    I have this rising now by morning I will bake it. I can’t wait I will let you know

  225. It is wonderful, I love it!!!!

  226. Few Question;
    1. can we use normal fine salt instead of Kosher slat? is the amount the same ?
    2. Can we put sugar
    3. Can we use milk to replace with water. The amount the same. Thought using milk will make it softer bread?
    4. After bang fresh from Oven, if you leave the bread for 3-4 hours, Bread will no longer crispy , is there a better way keep it fresh and crispy?

  227. If using table salt, I would reduce to 1/4 to 1/2 teaspoon, at most. There is no need to add sugar. I would not recommend replacing the water with milk, since the yeast needs warm water to activate. The fat in milk may inhibit this. To store, I’d suggest wrapping it in parchment paper and placing in a paper bag. Stored this way, it should stay fresh for 2-3 days, though may not be as crisp.

  228. 5 stars
    Thank you! I made this recipe tonight for company and it was a hit! I used a large glass Pyrex bowl. Recipe was easy to follow and worked beautifully.

  229. 5 stars
    This was AWESOME! I will definitely make it again and again!

  230. 5 stars
    I just took this out of the oven, and tasted it with some homemade blueberry jam, and it was Pretty good. A little on the salty side, so i think i will use 2tsps. instead of 3tsps. next time. My crust was hard on top, is it suppose to be like this for artisan style bread, or is it the kosher salt? Any tips would be really helpful, as i plan to make this again tomorrow.

  231. Yes, the top of the bread should be fairly firm, with a fluffy texture inside. You can find all of my tips in the “Notes” section of the recipe, and throughout the post.

  232. 5 stars
    Thank you so much for this recipe. This has not only become a family favorite but also a community favorite! Everyone asks me to make it. (And no one believes how easy it is!) One question- Is it possible to dump the dough straight into the preheated Dutch oven? The sticky dough makes quite a mess on my counters.

  233. I’m so glad you and others have enjoyed this bread! As far as transferring from bowl to pot, you need to somewhat “shape” the sticky risen dough on a well floured surface before adding it to the pot, so the countertop rest is necessary.

  234. 5 stars
    Um it is CRAZY that I just made this bread which looks and tastes like it was purchased at a bakery. Thanks for sharing such a cool recipe!! Now to figure out how to keep myself from devouring the entire loaf tonight…

  235. 5 stars
    I just finished making the bread from this recipe. Absolutely delightful! I might add that I only left it for about 4-5 hours and it was totally fine.

    I made one yesterday and forgot to put the yeast in…when I woke up I was shocked to see it hadn’t risen in the bowl! Then I saw the yeast packet on the counter. Oh…

    Everyone loved the bread! I served it with a homemade garlic butter (3 tablespoons Kerrygold Irish Butter and 2 cloves freshly crushed garlic!).

  236. No knead bread is very adaptable to variations in flour type. I’ve made walnut wheat bread, replacing 1 cup of the all purpose flour with whole wheat flour; and just baked a loaf substituting 1 cup of semolina flour for all purpose. I also added about a tablespoon of olive oil and the resulting bread is a beautiful yellow with a tighter softer crumb than the original recipe. It is delicious! I only use about 3/8 tsp. of instant yeast when I make this bread.

  237. 5 stars
    Thank you so much for this recipe! Me and my wife have tried multiple times to make bread (ciabatta, sourdough, bread loaves, etc.) with no positive results. However, we tried this and after two attempts, due to our oven being on the hot side and turning it down, we have great bread now! Your recipe is pretty foolproof and tastes amazing. For the past month, we’ve been making this twice a week and couldn’t be happier with the smell of fresh bread in the house.

    Keep the great recipes coming! Thanks again!

  238. ArizonaSun says:

    5 stars
    Great recipe, bread is delicious and have enjoyed many loafs.
    My issue is that the dough, after rising for the recommended time, is very “wet” and will not hold its shape. I even tried using 1-1/3 cups warm water and still have the same issue. Yeast is fresh and the dough rises very well. It cooks perfectly and as I said earlier it’s delicious; but transferring from the counter to the pot it’s a job in itself.
    Next time I’ll add a little more flour to the reduced water quantity and see if it improves the consistency of the dough.
    Open to any and all suggestions you may have.
    Thanks for sharing.

  239. As noted in the recipe directions, “Pop your dough out onto a well floured surface. It will be sticky, but with floured hands you can easily form it into a round dough ball.” In other words, you need to form the dough (which will be wet) into a ball using additional flour.

  240. Illinois Jan says:

    5 stars
    I have made this bread using white flour, whole wheat flour, oatmeal flour and then added a couple teaspoons of honey and sunflower seeds. Everybody, both men and women alike raved about it at a recent dinner I held. It was still just as easy to work with and though being a little denser, was absolutely delicious! My biggest problem is only being able to bake one loaf at a time. Thanks for all of the tips.

  241. 5 stars
    I made this bread yesterday. I got nervous when after only 5 hours my dough reached the top of my bowl which was very large. So I went thru the entire process earlier than stated. The only problem I had was the outer slices were gummy. Next time I’ll let it set for the entire amount of time and see if that makes a difference. It does look wonderful and tastes delicious. i didn’t add any salt since I’m on a low salt diet so it did need some sprucing up with different toppings. Thank you for this recipe!!

  242. Looks INCREDIBLE! Just wondering if you spritzed it with water before baking to get the crispy, crunchy top? I’ve read tons of recipes where people do that, so I was just curious :)

  243. Also…sorry forgot to include in my last question… When using Active Dry Yeast (as opposed to Instant) don’t you have to bloom it in water before adding it to the flour,etc? Sorry I’m a novice baker, so I have a gazillion questions :)

  244. For this recipe, it’s not necessary to proof the yeast. Also, no need to spritz with water before baking.

  245. 5 stars
    Thank you ever so much for a great recipe!! I stumbled on this last night and today I have the most beautiful, great tasting loaf, you’d think I just came from the bakery. I have the second loaf proofing on the counter as I type. Thanks a bunch!!

  246. 5 stars
    THIS BREAD SAVED MY LIFE!!

    After a series of unfortunate events I came out with No Job, No car, and just enough money in my savings to cover my bills and a few grocery items. I was nearly to the point of starving when I found this recipe. It was simple to make and I had all the ingredients. I was living on nothing but this bread and whatever else was leftover in my cabinets for over a month before I found another job. That was two years ago and I still make this bread twice a week. Thank you for the recpie.

  247. 5 stars
    Hi Georgia, I have the dough resting now. I went out and bought an enamelled cast iron Lagostina dutchoven. What I am concerned about is putting an empty pot in the oven and heating to 450 degrees. Will it be okay? Should water not be put in? Thanks…..PS,I am 64…this my first bread from scratch….cross your fingers….Kate from Canada

  248. Hi, please reference the Notes section at the bottom of the recipe for the answer to this question. Thanks!

  249. It came out beautifully…….Xmas gifts with homemade jam….perfect, thank you.

  250. 5 stars
    Just tried this recipe and it’s awesome!! I started it late and it only sat for about 6 hours and still turned out great! Thanks very much for the recipe!

  251. Makenna hodges says:

    5 stars
    I making this right now I put Rosemary and basil in. Mine and tomorrow I’m going to make garlic cheese pull apart bread

  252. 5 stars
    Wow. Wow wow wow!

    I doubled this recipe (in 2 separate bowls). It was interesting. The 1st dough was slightly thinner and didn’t rise as much, but the inside looked just like your photos – the outside looked fine, but not delicious looking like yours. The 2nd loaf must have had a tad more flour. It rose more, held together better, and looked better (like the crust in your pics), but didn’t have the amazing texture on the inside. I did everything exactly the same, or so I thought. I’m just fascinated by bread and dough and how teeny tiny variations can change the bread so much.

    All my observation aside, this bread was excellent – both loaves. We had some right out of the oven – delicious. We had some at room temp the next day – delicious. And we made the rest into thanksgiving day stuffing – best stuffing ever. Ever! I’ll be bookmarking this recipe for sure!

  253. 5 stars
    I tried making it and it tasted amazing! For the next on, I am planning on making a replica of Panera Bread’s broccoli cheddar soup in bread bowl. Thank you for the easy recipe; you saved my hands from hard kneading.

  254. Hi Georgia. I am planning on trying this method, but was hoping to use a portion of whole wheat flour, a quarter to a half. You mention not using whole wheat as it will be dense. I was wondering what your thoughts are on using a blend of whole and white?
    Thank you!

  255. Hi Anita. I’ve only ever made the recipe as written, so I cannot advise on a blend of white and whole wheat flour. However, another reader said they used whole wheat with great success. Good luck!

  256. Crockpot only approves using the insert up to 400° Have you used it at 450°before?

  257. Many readers who have tried this bread have used the Crockpot insert with success, but I would suggest not using the lid. Instead cover with aluminum foil.

  258. I have not, but if you are concerned, go ahead and use another one of the baking suggestions listed in the Notes section of the recipe.

  259. Absolutely amazing, made it today and it turned out brilliantly, will definitely be using this recipe in the future

  260. Wow! I can make one today. I have all the ingredients. I also have my Le Creuset pot. Perfect!

    best stainless steel cookware

  261. Hi
    Could you please specify how big a cup is, in this recipe? E.g. in grams. I’m in the UK, so not sure what kind of cup I need?
    Many thanks

  262. 1 cup of flour is 125 grams.

  263. thank you :-)

  264. 5 stars
    Awesome, simple recipe. I let it rise on the long-side; made the dough after dinner the night before, then baked it about 20hrs later. I was nervous because the dough was quite a bit ‘goopier’ than I expected before letting it rise (even though I added slightly less water than in recipe). And at the ‘making a ball’ final step, it still seemed a bit too wet. But lo, the result was super tasty, with a perfect texture, inside and out; and looked just like the pictures.

    Although it’s great as-is (well, with just butter – YUM!), looking forward to additions next batch – onions/garlic/shallots, rosemary and some blue cheese are high on my list!

  265. Do you scoop the flour out of the container with the measuring cup or do you put the flour into the cup with a spoon and level off the top with the back of a knife? I did the latter as I was taught but I know you end up with less flour that way and my dough was way too wet and I struggled with forming the ball even with ample flour. Needless to say, the loaf didn’t turn out so I was wondering how you measure the flour. Can’t wait to try again! Thanks!

  266. For this recipe, I scoop the flour, not spoon-and-level.

  267. Thanks! I think that was my problem…not enough flour

  268. Thanks for this recipe! Super easy. I used organic whole wheat flour (despite the recommendation), let the dough sit at room temperature for about 8 hrs, and the bread came out fine – albeit not as golden and airy as it appears in the picture. It was still fluffy enough and not heavy at all. Delicious too.

  269. HI!, I am wondering if after the first rise of 9 hours, you let the dough ball rise again before putting it into the dutch oven? I have read some recipes that say to let it rise again for 2 hours. I am not sure if that step is necessary.

    Thanks.

  270. No need for a second rise, just follow the instruction as listed.

  271. 5 stars
    I baked this bread today and couldn’t be happier! My husband had 3/4 of the loaf by himself with lots of butter as soon as it came out from the oven then with scrambled eggs!

  272. This bread looks exactly like what I want, but when I add the 1 1/2c of water to the 3c of flour, it makes more of a pancake batter…not a shaggy dough. Am I totally missing something??

  273. 5 stars
    ok this is a keeper recipe. literally takes less than three minutes to put together, and it came out b.e.a.uuuutifully. not only easy and beautiful – but delicious. after many failed attempts at bread making… this brought me some serious joy! everyone who had a slice said it was the best bread ever. light crisp outside, soft and airy center. complete perfection! thank you so.

  274. Sam Sunshine says:

    GREAT recipe thank you! however I wanted to make mention of something, after reading every single comment here and not running across what happens in my situation EVERY time I make this recipe.

    First time out making this I used regular dry active yeast. The dough did not seem to rise much (if at all) in a slightly airy but warmish kitchen for 24 hrs. I baked it up and got a very dense, (but delicious) SMALL (7 inch by 7 inch) flattish loaf of bread. Amounted to approx 6 thicker slices. I was expecting a larger loaf by the pictures, but perhaps this is normal? In any event… although it was dense as heck. Hubby and I slathered it with smoked salmon cream cheese and had it with a yummy seafood stew for last Game of Thrones night lol

    The second time around, I used QUICK RISING dry yeast and followed a readers suggestion in your comments to warm the oven to 200, turn it off, and put my steel bowl of dough into it covered to rise. I did so and after 24 hours rising time, I can see that it definitely rose a wee bit, but nothing like what I was expecting.

    Now that it has come out of the oven, I once again have a wee little semi flat loaf that looks brown, crusty and inviting, and is dense inside and not looking at ALL like your loaf pictures do. It is still delicious… make no mistake about that. Holes here and there, but not light and airy in any way. Due to not rising much? Or supposed to be dense?

    Now I am pleased as all get out that every single time, you make your own recipe that it turns out perfect and fabulous, and by the comments here I can tell that most of your followers are fortunate enough to have perfect loaves like yours…. but I can also see that there are many who are having issues achieving the results that you are. I believe that they (like me) were simply looking for some assistance from you on what could be wrong and how to perhaps correct it. Rather than simply hearing “oh I don’t know, mine always turns out fabulous every time”. Do you understand what I’m trying to get across to you?

    We all WANT to love this recipe and keep it forever. But perhaps a little assistance from the pro (that is you) would be in order.

    I am also wondering about the option of doubling the recipe. Have you done this yourself? I would like to produce a round lovely loaf like your perfect ones. It doesn’t seem like rocket science. But as you are the pro…not I, your guidance and wisdom here would (I’m sure)… be appreciated and welcomed by all who have similar issues.

    I’m in Sask Canada so no altitude issues either.

  275. I’d like to replace the 1/2 teaspoon of dry yeast with sourdough starter, what would be the equivalent amount to 1/2 teaspoon of dry yeast for this recipe?

  276. what if I don’t have a dutch oven? can I just use a pizza stone?

  277. 5 stars
    Wow. I made it and it came out awesome. Mixed it before leaving for work, popped in the oven after I got home. It doesn’t get any easier than this. Great recipe. I don’t have a dutch oven but a Graniteware pot and lid did the trick. Thanks for sharing.

  278. Hi! The first time I made this, it was very wet and would not hold its form. I just kept folding it with a bit of flour until it tightened up. I was worried it would go flat and be dense like bread I have made before. folding it seems to do the trick for me. Bread is definitely a learning process, from my experience. I also put mine in the oven with just the light on to rise, as I keep my house cool, and that has really helped my rising time. If it is cold I will turn the oven on for just about 30 seconds to get some heat, then turn it off and let the light hold the heat. Works great!
    When I took it out of the oven after baking , I was nervous it would be that flat, dense block, but it wasn’t! So, I hope this helps you. :)

  279. If you actually do have a “no bake artisan” recipe, as opposed to a no-knead artisan, you will be famous! :-)

  280. Sorry, that comment was in response to Eileen’s comment above.

  281. Sounds like your water is too moist. Try half wet water and half dry water.

    ;)

    P.s. My dough turned out exactly as pictured and nothing like pancake batter.

  282. Hi. Do you have an ingredient list for a gluten free version?

  283. 5 stars
    This bread is the easiest thing I’ve ever made, and it turned out so gorgeous looking and delicious I’ll be making it all the time. Only change: less salt, maybe just a tsp.

    Thank you so much!

  284. Priscilla Andres says:

    I made this with success with one exception, it did not retain the crusty outer layer. Do you hav suggestions to help with crus times?

  285. I use a small casserole size. Just divide the dough in half. Roll into logs and put in casserole dish. Add lid and bake per recipe. After baking pull the loaves apart and enjoy.

  286. Do you work the dough after the 8 hours?

  287. I am making this now.
    All good until now…
    My dough is so moist it does not form into a ball???
    I placed it on parchment, & fingers crossed that it comes out of the oven looking like yours.

  288. I was wondering if a shallow dutch oven is enough space for the bread and if it affects the baking time? If not would it be better to use a deep cast iron skillet with foil or a shallow dutch oven with foil?

  289. 5 stars
    My favorite bread recipe. So simple and the bread has such a great texture. I add a bit more salt and garlic (powdered and some paste) to the recipe to give it more flavor.

    The hardest part of this recipe is the 8-24 hour wait for the dough to rise!

  290. add some more flour

  291. Hi there! Can I ask for some help? I made this bread using GF flour that already had the xanthium gum in it and my dough didn’t rise after letting it sit for 24 hours and when I cooked it it stayed raw on the inside. The dough was extremely crumbly after mixing everything together. I am dying to get this right so that I can dip it into olive oil and garlic! Would you mind helping me?
    Thanks so much!

  292. I know I’m very late in commenting, but I’m wondering if the bread can be slightly more dense? My husband is Moroccan and they like a hearty bread with their meals and this is just a bit too airy inside (I’ve made this before and it is delicious!! but he’s not a huge fan of the holes).

    Thanks!

  293. 5 stars
    It cooked beautifully and looked just like you picture in the end.

  294. 5 stars
    I made this bread exactly as directed except that I didn’t have dutch oven soI baked it a normal cooking vessel wi lid on n then witho the lid… but mine came out raw inside n even the crust didn’t turn golden brown though I did try baking a good ten mins extra… where do u think I went wrong
    I surely do wanna give another try as its sooo very eazy… but when it turns out so inedible its demotivating…though I don’t give up

  295. 5 stars
    Excellent bread, hard crust, chewy texture, real bread! I added rosemary and cracked black pepper. Delicious. Only lasted two days, about to start another loaf. Only problem…plain, or what to add this time! A tip i learned the hard way in the past, I always “proof” my yeast in a small glass bowl, with warm water, a little honey, and of course, the yeast. Wait until it gets very “foamy”. That way you know the yeast is good and active.

  296. Hi,
    I notice you say NOT to use table salt… why is that ??
    and could I add about 1 tablespoon of honey ?
    Can’t wait to try this.. Thanks

  297. Can this bread be frozen successfully? I’ve made two loaves this week. First batter was a little wetter and I think because I spooned the flour and leveled. 2nd loaf, I dipped the flour and leveled off, and used more flour on my hands to form. The 2nd was much better. There are only 2 of us so I’d like to make a couple and freeze, if possible.
    Also wondering: If adding garlic — is it best to use roasted garlic or raw? Also how much to use?

    Last question, can dough be formed into a fat log shape to bake, would bake temp and time be the same? What sort of container? Cover with foil?

    Great recipe. It is so good to dip in EVOO and parm!

    Thanks for info help.

  298. 5 stars
    This could be one of the best breads I have ever made! Looked spectacular and tasted amazing! Texture was fantastic inside and out. Wish I could post a picture for you to see, it was gorgeous! Thx for posting the recipe, it’s moved to the “keeper” file. :-)

  299. 5 stars
    I’ve never made any kind of bread before, but I made a double batch of this SIMPLE recipe last week and it was DELIGHTFUL. My husband, dad, one year old, and a few guests tore into it and it was gone before it could cool.

    It seems to have withstood even my hectic life. We got busy and it sat for closer to 26 hours (whoops), we cooked it in a cast iron skillet covered in foil (whatchagot works!), and I mixed rosemary and black pepper into the dry mix. I also painted the exterior with extra virgin olive oil when I pulled off the foil to finish the crust and MAN. So. Much. Yum. Thank you for this great and simple recipe! My husband says we’re not allowed to buy bread anymore! ;D

  300. Maybe try it in a different cooking vessel – I used a skillet with foil over it. My only other thought is that it’s possible your oven wasn’t really at 450. Some ovens are like that! For instance, mine’s hotter in the back than the front.

    The end product is SO worth it so keep trying! Good luck!

  301. So why does it need to be covered? I do make bread, but I’ve never covered it. Just trying to figure out what the difference is :) Thanks

  302. 5 stars
    THANKYOU!
    I made this today and it turned out awesome!
    So easy and so yummy

  303. It sounds like your yeast might be expired. Have you tried checking the date?

  304. todd terminie says:

    5 stars
    Ok so I made it. Was certainly more fabulous than I expected since just flour and water. I mean like divine. Took seven minutes on the uncovered part. Super crusty and did not stick to dutch oven. Since I’m a calorie counter (it only gets better) 3 cups flour was 445 grams. That is 1620 calories. Weight after baking came in at 24.25 oz or 66.80 calories per ounce. One hell of a caloric deal. Thanks so much.

  305. irma sherman sherman says:

    I just saw the recipe but I am wondering what kind of flour – bleached unbleached sifted or non sifted – there are so many types Please let me know so I can make the bread thanks

  306. Mary Roughton says:

    5 stars
    The most fantastic bread l have ever made, this recipe is an absolute must keep.
    If you don’t try this recipe, you don’t know what you are missing.

    Mary M

  307. 5 stars
    Natively crusty bread is my top choice! This looks mind boggling, can hardly wait to attempt it!
    https://makuv.blog/food/the-traditional-foods-of-india/

  308. 5 stars
    Basic question… do you proof the yeast before adding to the flour or sprinkle it in directly?

  309. Warm water is added to the flour, salt and yeast mixture. So the yeast proofs this way. Enjoy!

  310. DANIEL OLSEN says:

    5 stars
    Made it today. I was worried it didn’t rise properly, but worked out great. Looks fantastic and tastes even better!

  311. First time baking. The bread baked great. I followed the recipe and found the bread so salty I can’t eat it. I’m no baker by any means. I don’t know what went wrong. But too much salt for my liking.

  312. Very important to use kosher salt in this recipe, not fine table salt. That was most likely the problem that you ran into. Using coarser kosher salt, the bread is not salty at all.

  313. 5 stars
    I tried this for the first time last night and let it rest for roughly 18 hours. I added about a tablespoon each of garlic powder, dried chives and dried rosemary to the dry ingredients and it is OUTSTANDING!!!!!!! I had to bake mine in a stainless steel pot and it turned out great.
    I love the texture and the crust it gets.

    Thank you for sharing this recipe^.^

  314. Hi Georgia
    I just made you delicious bread but the bottom of the bread came out real hard. The top of the bread was perfect. I don’t have a Dutch oven, I used a casserole dish. Does that make a difference?

  315. 5 stars
    I obviously am late to the party but this recipe is superb. I followed it exactly once. Perfection. Then the second batch, I added garlic powder and Italian seasoning. Superb. Im already making my third loaf in 2 days. Thank you for a wonderful recipe.

  316. 5 stars
    This was a very fast and easy bread to make. I always go the long route to make yeast buns where it takes 2hrs to make. When I came upon this recipe, OMG it was awsome. The bread came out moist and delicious. When it was done, after pulling it out from oven, I brushed lightly with margarine to make the crust less hard. It had a more chewy texture. I would use a little less salt as well, instead of using the 2tsp of kosher salt, I would try to used 1-1/2tsp instead. Other than that, thanks sooooo munch for this scrumptious recipe!

  317. 5 stars
    Just a side note, I read a few comments for bread that didn’t rise , it is possible that your yeast could be outdated, but I had similar issue way back when and almost threw in the towel making bread because it never turned out. Was either hard, flat. Turns out the type of yeast you use makes a difference too! If you are using quick rise yeast, the water temp has to be at least 125F, which is higher than traditional yeast which is about 100F. Hope this helps

  318. 4 stars
    I used table salt – kosher is too variable – and weighing the dry flour gave me 9 grams or 1 1/2 teaspoons at 2%. Made a nice loaf – VERY TASTY!

  319. 5 stars
    It’s really good! I found it almost impossible to get a nice ’round’ loaf like the one shown here, but even misshapen… it still tastes great. I’m serving it with seasoned dipping oil, but it would be great with butter too. I did try brushing the surface with melted butter (which I do on bread machine loaves to soften the crust a bit), but it’s not absorbing the same way it does on those other loaves.

  320. 5 stars
    Love this bread! Sometimes I get tired just thinking about the prospect of making bread or other yeast recipes, but this is literally the easiest thing. LITERALLY 4 minutes to mix together.
    But I do have a question: the recipe preamble mentions mixing in other flavors…has anyone tried this? And if you’re adding dry ingredients (I had been thinking about grated Parmesan cheese and garlic powder), do you add in with the flour/salt/yeast, or would that prevent yeast from activating? Thanks for any tips on this!

  321. 5 stars
    I put my dough on a good sized piece of parchment paper. I can use the paper to lift and place the dough into the dutch oven, and to remove it. It saves me from burns on my skin which happen often when bake anything! It works really well.

  322. 5 stars
    I love this bread recipe, best bread out there, however I live at altitude +-5500ft above sea level in Johannesburg, South Africa. Bread is perfect using the listed recipe, but making it on holiday recently at sea level, it only rose 2 inches! What do I need to adjust?

  323. Laurie Manion says:

    5 stars
    Hi there! I’ve been making this bread for several years. It’s my go to recipe. So delicious. The last couple times I made it, it didn’t rise as much. My yeast is fresh, help! what am I doing wrong?

  324. I’m so glad you have enjoyed this recipe. Without more details, it’s hard to say what may be happening. But I would try a longer rise time. I’ve let this rise anywhere from 8-24 hours. Also make sure you’re not over-working the dough and letting those fluffy air pockets form. Good luck!

  325. Hi guys, I think it’s just because my oven is just really old, but my bread came out a little undercooked from the inside and slightly burnt on the outside. I used aluminium foil and a baking tray. Any suggestion?

  326. Hi, just want to confirm its one time rising?

  327. That’s right! Recipe is exact as written.

  328. 5 stars
    Finally a loaf that makes a beginner bread maker proud! Recipe link below. I used Sunrise Flour Mill Heritage Bread Blend and followed your recipe exactly. I did not weigh the flour, rather just scooped it gently into the cup. The rise was 22 hours. Bake time was 30 minutes covered at 450 in a pre-heated 3.5 quart Le Creuset dutch oven, followed by 10 minutes more uncovered to brown. Can barely restrain myself from cutting a slice! Being good and waiting for it to cool. Recipe was so easy. Just requires a bit of planning because of the long rise time (8-24 hours).

  329. yummy

  330. 5 stars
    Totally yummy and easiest bread ever

  331. MARION. …… Hope you got to try this ….. It is the best bread ever. We make it all the time.

  332. Made a loaf for the first time for Thanksgiving. It looked beautiful and already golden brown BEFORE the no-lid bake, so I didn’t know what to do! Because I was worried the crust would burn, I skipped the 7-15 minutes. My crust was WAAAY too “crusty” (could barely cut it, even with a bread knife) and the inside was undercooked. What should I do differently? Brush with olive oil prior to baking to soften crust?

  333. Cheryl Rasbach says:

    5 stars
    This is a great recipe, you can’t mess it up. I double batch in the evening and let it sit all night, then make one batch the next day and refrigerate the left over dough for up to another 2-3 days.

  334. 5 stars
    I LOVE this bread so much!!! I’ve made it many times over the years. I decided to make a bunch of loaves for small gifts this holiday season and I’m wondering, would this recipe freeze well? Could I make them ahead on a day I have time to bake them all and freeze them to gift as needed?

  335. Is it really 1 and a half cups of water? This is my second time making this and both times my dough has been so soggy, unable to be formed into a ball at all.

  336. 5 stars
    So good and easy. This is the second time I made this bread. This time I added just over 1/2 C of Kalamata olives. I could have added 1 cup. Thank you for sharing this wonderful and versatile recipe.

  337. So happy to hear you had success with this recipe, Diane! I love the addition of Kalamata olives – so creative and delicious. Thanks for writing in!

  338. Nena allevato says:

    Can the dough be frozen after the first proof? If so, would you explain? Thank you so much! I’ve baked this bread as directed and loved it!

  339. I’ve never frozen the dough after the first proof. I couldn’t tell you what the results would be, but I recommend a long rise and baking after it is risen.

  340. 5 stars
    Made your bread today and it was incredible! My first attempt at making bread and couldn’t believe it was so good. Even my husband loved it & he’s a chef. Going mix up another batch so I can make tomorrow. This loaf is almost gone.
    Thanks, so glad I found this on Pinterest. Ron

  341. In my kitchen, this required more like 4 1/2 cups flour. Will see what it looks like later; I just put it together.

  342. Ok, I’m 5 hours in, 73F room temp and I’m already bubbly on surface and double in size. I’m afraid 4 more hours will over-proof. Next time I believe I’ll cold proof.

  343. Colette Dubeau says:

    What size dutch oven is required? Would a 2.7L be okay or would it be to small?

  344. This is seriously one of the BEST recipes! I’ve made it a few times and here’s what I have to say, the rest time is long BUT WORTH IT. DONT SKIP IT. the first time I read it I thought it was long and let it rise for an hour or two and although delicious the texture was dense(still enjoyable just not what I was going for) so I then tried the recipe as written and worth it. This was just my error because I’m impatient. I don’t own a Dutch oven either so instead of buying one I used a stainless steal pot because it was the only thing similar that I had a lid on and the last 15-25 minutes I took the lid off which is wear the browning period came from. the dough is simple to make it’s mainly just the time of resting and cooking that I take as suggestions in ALL recipes so if your like me- don’t skip it in this !

  345. Carol Cantelmo says:

    I love this recipe!! I just made it for the 2nd time and it didn’t turn out like before and don’t know what I did wrong…never really rose, more like a pancake. The dough never really came together, but, I Can’t wait to cut it tomorrow at my brothers house – I’ve got the goat cheese & homemade honey pear jam. I hope it tastes as good as the first time, browned up beautifully just didn’t raise. Can I use more than a tsp of dry yeast? Thanks!

  346. Am I the idiot? When I transfer to the dutch over to cook, it falls and isn’t very “fluffy” what am I doing wrong?

  347. Carol Abbott says:

    Could you possibly let it rise in the oven to cut out some of the time it takes to proof? I’ve seen on some recipes to turn oven on 200 for a few minutes turn it off and put your bowl of dough in there for a couple of hours.

  348. Has anyone tried this with King Arthur Gluten-Free Flour?

  349. How did you get the ball to form? I did 18 hour ferment and a couple of stretch and folds. That gave it a little body but was still spreading out. Did I need to flower my hands with a lot more flower or is there something else I could have done?

Leave a Reply

Your email address will not be published. Required fields are marked *

Close
The Comfort of Cooking © Copyright 2024. All rights reserved.
Close
Skip to Recipe