
I can barely believe it’s been six months since we moved into our first home in Texas. And now, just as quickly as we signed on the dotted line, we’re celebrating our first Christmas here! Well, not exactly here, but at my in-laws’ cozy home in New Jersey. That doesn’t mean it’s any less festive here in Texas, though. The stockings are hung, the tree is twinkling, and the oven has been getting a good workout with a steady influx of cookies and cakes. Christmas is in full swing!

These fancy and fun, yet incredibly easy, cookies have been one of the most festive treats to make it out of my kitchen lately. Hopefully, you’ll try them in yours, too!
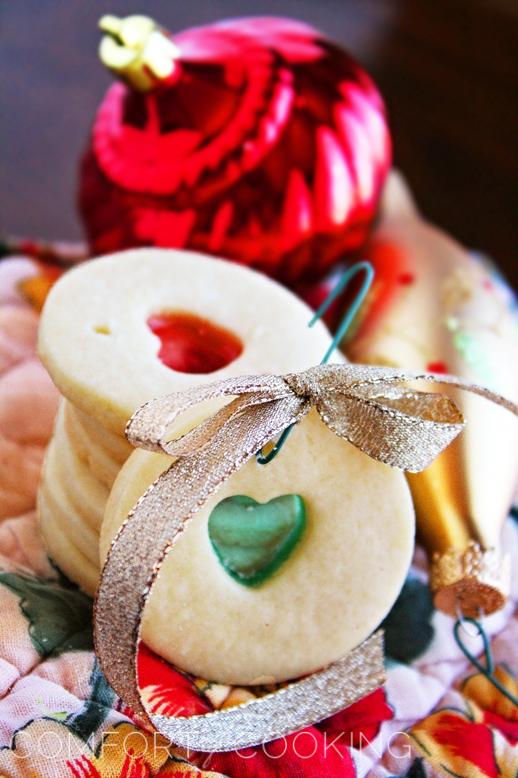
The base is just a simple sugar cookie from scratch, along with a small cut-out filled with crushed hard candies (I used Jolly Ranchers). The cookies are baked for 8-10 minutes, and right when they come out of the oven, pricked with small holes for the wire ornament hook. Once the cookies are cool, string ‘em up anywhere you like, or give them as a sweet gift to someone special!

If you’re not interested in making the ornaments and really just need the guidelines to a good, basic sugar cookie, the best recipe for you is included below. These cookies were very simple and quick to make, and yielded a sturdy yet buttery soft cookie that would make an ideal base for whatever designs you dream up!
Enjoy these cookies, and have a very happy holiday season! I’ll be back with more delicious ideas and sweet treats next week.
Stained Glass Cookie Ornaments
Ingredients
- 1 cup unsalted butter, softened
- 3/4 cup sugar
- 1 large egg
- 1 teaspoon vanilla extract
- 1/3 teaspoon salt
- 2 1/2 cups flour
- 15 small hard candies for cookie center, I used Jolly Ranchers, crushed
Instructions
To make the dough:
- Using an electric mixer at medium-high speed, cream the butter, gradually adding the sugar. Beat in the egg until evenly mixed, then blend in the vanilla extract and salt.
- With a wooden spoon, stir the flour into the creamed ingredients, about one third at a time, until evenly blended.
- Divide the dough in half. Flatten each portion into a disk and seal in plastic wrap. Refrigerate overnight.
To create the cookies:
- Heat the oven to 375 degrees. Cover a sturdy baking sheet with aluminum foil and lightly coat the foil with cooking spray. Between 2 sheets of waxed paper lightly dusted with flour, roll the dough to a 1/4-inch thickness. Remove the top sheet.
- Cut out the cookies with a large cookie cutter or a round biscuit cutter. Use a lightly floured spatula to transfer the shapes to the baking sheet, leaving about an inch between cookies. Remove the centers of the cookies with a smaller cookie cutter of your desired shape.
- Place a pinch of crushed hard candy into the center of each cookie and bake until the cookies start to brown lightly around the edges and the candy is melted, about 8 to 10 minutes. Let the cookies cool on the baking sheet for 5 minutes, then transfer them to wire racks to cool completely. To prevent sticking, line your serving plate or tin with waxed paper and place additional waxed paper between layers.
To create ornaments:
- Immediately after removing cookies from oven, gently dot a small hole in the top of each cookie with a toothpick. Gently swirl the toothpick in a circular motion to create a larger hole. Allow cookies to cool completely, then hook through each hole with a wire ornament hook. Garnish with a ribbon, if desired, and hang. This is a fun activity for kids and a delicious treat to pluck from the tree! I recommend eating the cookies 1-2 days within hanging them.
- Enjoy!
I love these! So simple, yet so cute! And festive :). These would be great as an addition to a Chrismas dessert table. I might need them to add them to my own!
These bring back memories. When the kids were little we’d bake a different cookie each day for the 12 days of Christmas and this was one of them. I used Lifesavers and they got a kick out of smashing them. I like that you used Jolly Ranchers, way more flavor.
Your cookies look wonderful and I love that you made them into edible tree ornaments.
We are having an ornament exchange with a group of women from church….thinking these would make a perfect touch for the refreshment table!!! Thanks so much!
SO glad you posted these. I had seen something similar in an issue of Martha Stewart ages ago, but had lost the recipe. Thank you so much for sharing! Can’t wait to try these. They are beautiful!
The first time I made a batch of stained glass cookies, the directions didn’t say anything about lining the pan. So I didn’t… the cookies were completey stuck! I had to rebake them and ruin the cookies to melt the candies enough to get them off the cookie sheet!
Hi Jen – That’s awful! For this recipe, definitely line the pan with parchment paper and lightly coat with cooking spray. The 5-minute cool down period is also necessary for the candy portion to unstick from the pan. Hope you try these and have better success!
So beautiful Georgia! pinning now :)
These looks amazing. What a cool idea.
wow these are a delicate cookies, so nice to assembly the Christmas tree :)
These are so pretty! But something tells me I would probably eat them all before they made it to the tree. :)
I love this idea. Looks so pretty too.
Aren’t these adorable? They would make super-cute gifts for my co-workers. Perhaps I’ll whip up a batch next weekend to take in on Monday!!
Absolutely gorgeous! What a great idea. I’ve already baked my you know what off but now I want to do more!
I can’t believe how simple these are, but look amazing :)
These are just beautiful! And congratulations on your first Christmas in your new home, enjoy :)
These are SO cute, Georgia!!
These are beautiful and delicious at the same time. My daughter picked these out to make at Christmas this year. I’m super excited to feature this post using one picture as part of a collage in my Operation Christmas Cookie post at http://everystarisdifferent.blogspot.com. Thank you so much for sharing!
Wow that was strange. I just wrote an extremely long comment but after I clicked submit my comment didn’t show up. Grrrr… well I’m not writing all that over again. Anyhow, just wanted to say fantastic blog!